These helpful layer mask tips will help to streamline your digital art workflow.
As any beginner Photoshop tutorial
will tell you, layer masks are one of the most fundamental parts of the
software. Without them your work is sure to look flat. To help you work
more quickly and easily with layer masks, we've put together this list
of seven tips and shortcuts.
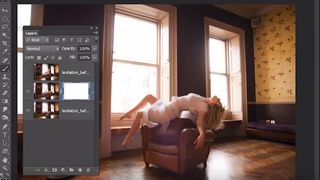
01. Painting on masks
While
painting on masks with the Brush Tool, press D to set colours to black
and white; black hides, white reveals. Press X to flip between the two.
02. Add a full mask
Alt-click
the Add Mask icon in the Layers Panel for a black mask that completely
hides the layer (or highlight a white mask thumbnail and press
Cmd/Ctrl+I to invert it to black).
03. View a mask
You can Alt-click a layer mask thumbnail to toggle a view on or off that shows the layer mask instead of the image.
04. Paint with Overlay
When
you’re painting in white or black on a mask, try setting the Brush
Blend Mode to Overlay. This enables you to gently tidy up any messy
edges you come across.
05. Copy masks
Hold
Alt and drag a layer mask thumbnail from one layer to another to copy
it over, or Cmd/Ctrl click the thumbnail to load a selection .
06. Refine mask
Right-click
a mask thumbnail and choose Refine Mask to access a near-identical set
of controls to Refine Edge, which let you improve the mask.
07. Unlink
Click
the little link between layer and mask thumbnails in the Layers Panel
to toggle it off. This lets you move the layer contents or mask
independently of one another.


Comments
Post a Comment